






















![[2 Pack] Coospo Breathable Neck Gaiter Face Scarf Mask COOSPO](http://www.coospo.com/cdn/shop/files/106de7b046babc03aa610173af6e31aa_599da3fe-9907-4b1e-8eb0-f08b3032720b.png?v=1720591174&width=1600)


![[4 Pack] Coospo Soft Breathable Chilly Towel, Microfiber Towel COOSPO](http://www.coospo.com/cdn/shop/files/1_904094cc-62ee-40e9-aa21-415effb385b4.png?v=1720527561&width=1600)

Introduzione
Il percorso di ogni ciclista segue un'evoluzione naturale. Inizia con il semplice gonfiaggio delle gomme, prosegue con la pulizia della trasmissione, si passa alla regolazione dei freni a disco e infine giunge al traguardo finale: la revisione annuale.
Una revisione annuale (spesso chiamata "Strip") & La revisione completa (eseguita da meccanici professionisti) è il processo che prevede lo smontaggio della bicicletta fino al telaio, l'ispezione dei cuscinetti interni sottoposti a carichi elevati, la sostituzione dei cavi usurati e il ripristino di ogni componente secondo le tolleranze di fabbrica. Mentre portare la bicicletta in officina per una revisione può costare dai 200 ai 400 dollari, farlo nel proprio garage è incredibilmente gratificante, approfondisce le proprie conoscenze tecniche e garantisce che la bicicletta funzioni in modo impeccabile per un'altra stagione.
A conclusione della nostra serie di 5 parti sulla manutenzione, la Parte 5 funge da vera e propria lezione magistrale su come allestire un'officina domestica funzionale, padroneggiare la coppia di serraggio dei bulloni, eseguire la manutenzione dei cuscinetti nascosti e effettuare le sostituzioni annuali dei componenti.
Parte 1: Costruire l'officina domestica definitiva
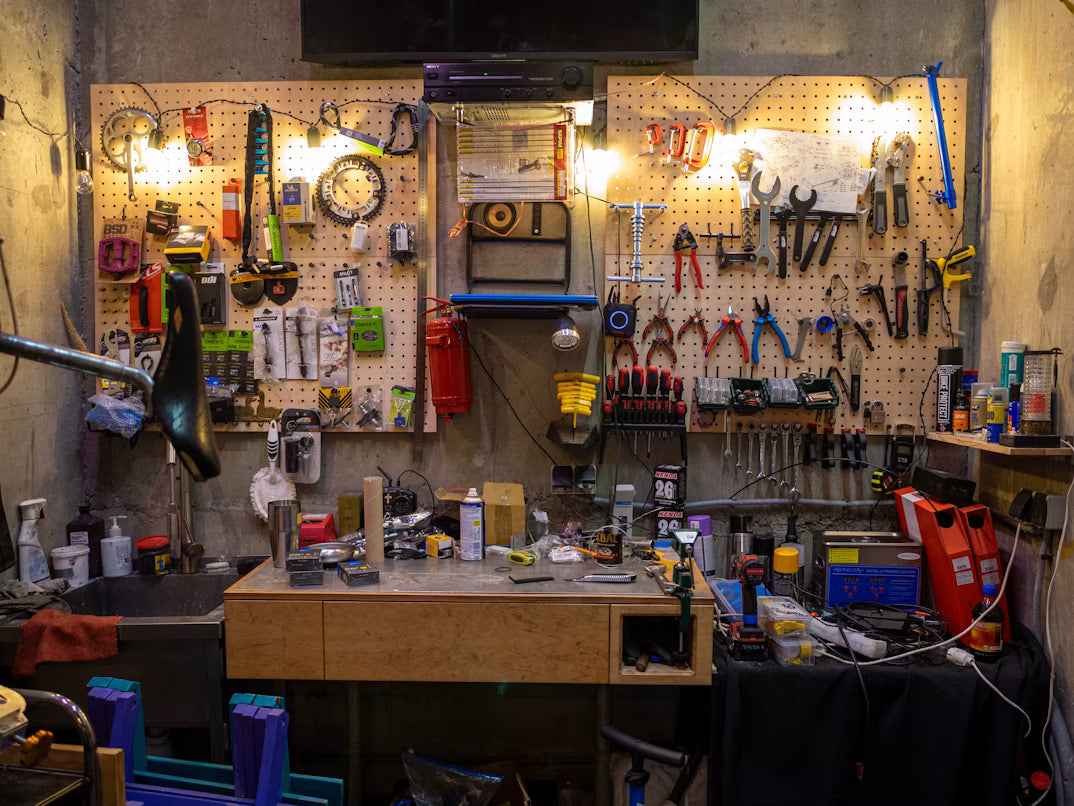
Non serve un'officina professionale per eseguire lavori di livello professionale. Un modesto investimento in pochi attrezzi specifici per biciclette si ripaga da solo dopo una sola stagione di manutenzione fai-da-te.
Kit di avviamento per l'officina domestica
1. Cavalletto da lavoro (il miglior investimento in assoluto): cercare di riparare una bicicletta appoggiandola al divano o capovolgendola affatica la schiena e rischia di danneggiare i comandi. Un robusto cavalletto con morsetto regolabile in altezza rende ogni lavoro cinque volte più veloce.
2. preimpostato & Chiavi dinamometriche regolabili (gamma da 2 a 14 Nm): le biciclette moderne si affidano molto all'alluminio leggero e alla fragile fibra di carbonio. Stimare la coppia di serraggio dei bulloni a occhio è il modo migliore per rompere il carbonio.
3. Tronchesi per cavi specifiche: non utilizzare mai normali pinze per cavi sui cavi della bicicletta. Le tronchesi per cavi specifiche per biciclette tagliano in modo netto i fili d'acciaio intrecciati e la guaina esterna senza appiattire il rivestimento.
4. Strumento per l'anello di bloccaggio della cassetta & Smagliacatena: Necessaria per rimuovere le cassette posteriori e accedere ai cuscinetti delle ruote o per pulire a fondo i pignoni.
5. Chiavi esagonali di precisione (da 2 mm a 8 mm) & Chiavi Torx (T25/T30): le chiavi a L di alta qualità prevengono il danneggiamento delle teste dei bulloni.
 =
=
Parte 2: La scienza della coppia (protezione del carbonio) & Alluminio)
L'errore più comune commesso dai meccanici amatoriali è quello di stringere eccessivamente i bulloni piccoli. I moderni componenti in carbonio (manubri, reggisella, attacchi manubrio e morsetti del telaio) sono progettati per assorbire le forze verticali durante la pedalata, ma si schiacciano facilmente sotto un'eccessiva forza di compressione radiale.
1. Comprensione dei Newton-metri (Nm)
Ogni bullone critico del telaio ha una specifica di coppia massima incisa o stampata vicino alla filettatura (e.g. , "5 Nm max".
● Coppia insufficiente: provoca lo scivolamento verso il basso del reggisella durante la pedalata o la torsione improvvisa del manubrio in caso di frenata brusca.
● Coppia di serraggio eccessiva: può causare crepe nei tubi di sterzo in carbonio all'interno degli attacchi manubrio, spanare le filettature nei telai in alluminio o spezzare le teste dei bulloni in titanio.
2. Pasta abrasiva vs.Grasso standard
L'utilizzo del composto interfacciale corretto è altrettanto fondamentale quanto l'utilizzo di una chiave dinamometrica.
|
SELEZIONE DEL COMPOSTO DI INTERFACCIA |
|||
|
Tipo composto |
Dove presentare la domanda |
Funzione primaria |
Non usare mai su |
|
Pasta di assemblaggio al carbonio (pasta antiscivolo) |
Reggisella in carbonio Manubri/attacchi manubrio in carbonio |
La micro-grana crea attrito; riduce la coppia necessaria |
Assi filettati o cuscinetti lisci metallo su metallo |
|
Grasso impermeabile sintetico |
Movimento centrale filettato, filettatura per pedali, perni passanti |
Previene l'usura e la formazione di ruggine sui metalli. e scricchiolante |
Superfici in fibra di carbonio che rallentano lo scivolamento |
Parte 3: Manutenzione dei cuscinetti (Serie auricolari) & Movimento centrale)
La tua bicicletta contiene diversi gruppi di cuscinetti critici che consentono una rotazione fluida sotto il carico pesante del ciclista: il cuffie (sterzo), movimento centrale (pedalando), e mozzi delle ruote (rotolamento). Nel corso di un anno di utilizzo, sudore, pioggia e polvere stradale lavano via le guarnizioni in gomma, degradando il grasso all'interno.
1. Manutenzione delle cuffie (Rituale annuale)
Smontaggio: Rimuovi il tappo superiore, allenta i bulloni dell'attacco manubrio, sfila i distanziali e sfila la forcella dal tubo sterzo del telaio.
Ispezione: Pulisci il vecchio grasso sporco dai cuscinetti della cartuccia superiore e inferiore. Fai girare l'anello interno con un dito. Se gira senza intoppi, va bene; se invece gira a scatti o con attrito, sostituisci il gruppo cartuccia sigillato.
Reimballaggio: Applicare un abbondante strato di grasso marino impermeabile alle calotte dei cuscinetti del tubo sterzo, reinserire i cuscinetti al loro posto, reinserire la forcella ed eliminare il gioco della serie sterzo precaricando il tappo superiore prima di serrare i bulloni dell'attacco manubrio.
2. Risoluzione dei problemi relativi ai movimenti centrali che cigolano
Un "clic" o uno "scricchiolio" ritmico che si avverte pedalando con forza in salita è quasi sempre causato da una filettatura del movimento centrale asciutta o sporca.
● Rimuovere le pedivelle utilizzando un bullone autoestraente o un estrattore per pedivelle.
● Svitare o estrarre le calotte del movimento centrale.
● Pulire accuratamente le filettature del telaio, riapplicare del grasso impermeabile fresco (o del frenafiletti per le unità a pressione) e serrare alla coppia specificata dal produttore (in genere 35-40 Nm).

Parte 4: Sostituzione dei cavi del cambio & Alloggi (Ripristino dello spostamento nitido)
Dopo oltre 12 mesi di utilizzo, i cavi interni del cambio si allungano, si sfilacciano all'interno delle leve e scavano solchi nelle guarnizioni interne in plastica. Sostituire annualmente i cavi meccanici ripristina quella sensazione di cambiata leggera e fluida come quando il cambio era nuovo di fabbrica.
Rinnovo dei cavi passo dopo passo:
1. Passare al pignone più piccolo: rilasciare sempre completamente la tensione del cavo prima di iniziare.
2. Taglio & Tirare: Tagliando il bullone di ancoraggio del cavo sul deragliatore, estrarre completamente il vecchio cavo interno attraverso la leva del cambio.
3. Misura & Tagliare la guaina: disporre i vecchi segmenti di guaina esterna accanto a quelli nuovi. Utilizzare delle tronchesi per cavi per effettuare tagli netti e precisi. Utilizzare un plettro per riaprire il tubo interno di rivestimento in teflon se schiacciato.
4. Installare i puntali & Infilare il filo: far scorrere le ghiere metalliche sulle estremità della guaina, infilare il filo interno liscio in acciaio inossidabile attraverso il cambio, guidarlo attraverso la guaina, fissarlo al deragliatore e chiudere l'estremità del filo con una crimpatura per evitare che si sfilacci.
Fai da te o officina professionale: conoscere i propri limiti
Se da un lato occuparsi della manutenzione della propria bicicletta aumenta la sicurezza in sé stessi, dall'altro sapere quando consultare un meccanico qualificato previene errori pericolosi.

Conclusione
Prendersi cura della manutenzione della propria bicicletta completa il ciclo dell'esperienza ciclistica. Allestendo una piccola officina domestica, rispettando i limiti di coppia con chiavi di precisione, lubrificando regolarmente i cuscinetti con grasso fresco e sostituendo i cavi ogni anno, si garantisce che la bicicletta rimanga veloce, silenziosa e sicura per migliaia di chilometri a venire.
Grazie per aver seguito il nostro Serie di 5 parti sulla manutenzione della bicicletta! Tenete la catena pulita, le gomme gonfie e ci vediamo in strada!




Lascia un commento
Questo sito è protetto da hCaptcha e applica le Norme sulla privacy e i Termini di servizio di hCaptcha.